Realising the iPad Pro’s Potential
December 16, 2015
Last week, Bloomberg announced an updated Bloomberg Professional app for iPad Pro and iOS 9. The launch of new operating systems and connected devices impacts productivity and creativity, and at the same time, presents enormous opportunities for developers.
Below is an inside, behind-the-scenes look at some of the main challenges we faced and how we addressed them. For example, how do you optimize an app for a specific environment without having access to the device? How do you test implementation? How do you know if the architecture is flexible enough?
By: Philip Miller, Head of Research and Development for Bloomberg Professional Mobile; Philip McDermott, Software Developer for Bloomberg Professional Mobile
Resolution Scaling
The first challenge as a team was to really get a feel for all that new screen real estate and how to take full advantage of it. This was made more challenging by the fact the iPad Pro had been announced but not released, and so the hardware was not available yet.
Therefore, we had to turn to software.
Xcode provides an iPad Pro simulator, but simulators couldn’t give our interaction and visual designers the full multi-touch experience for experimentation.
Our solution was to build view scaling right into our existing app. This worked in the same way as the desktop scaling OS X provides on retina Macs: change the direct mapping of points to pixels to provide more space. Using this solution, we could scale the full screen size of an iPad Pro down onto an iPad Air.
The regular iPad has a screen resolution of 2048 x 1536, and the Pro 2732 x 2048. Therefore, to scale up we pass a value of 1.333 to this method:
– (void)emulateResolutionWithScale:(CGFloat)resolutionScale {
contentView.size = CGSizeMake(view.size.width * resolutionScale, view.size.height * resolutionScale);
contentView.transform = CGAffineTransformMakeScale(1.0/resolutionScale, 1.0/resolutionScale);
contentView.centerX = view.size.width / 2.0;
contentView.centerY = view.size.height / 2.0;
// Soft-relaunch the app here
}
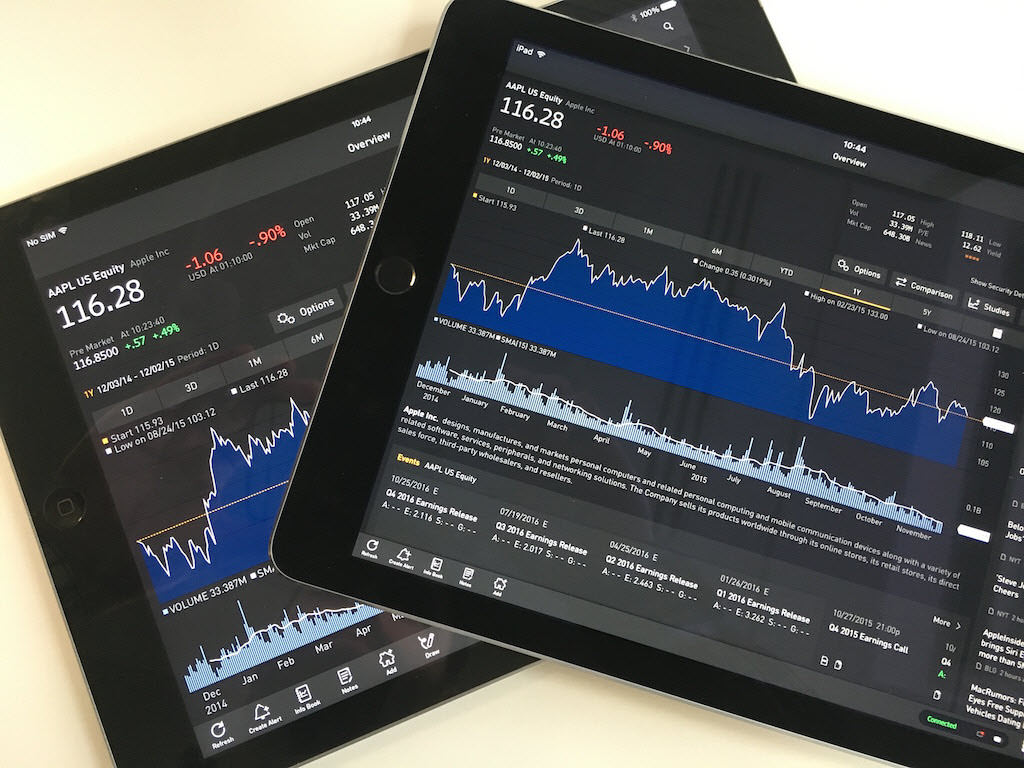
Two iPad Airs with view scaling off and on
Multitasking
iOS 9 brings true multitasking to the iPad, with a split-screen view that allows the user to view or interact with two apps at once. Supporting this for us was a no-brainer, but at Bloomberg we wanted to take multitasking a step further. The Bloomberg Professional app is really a suite of apps – it provides email, news, instant messaging, notes, stock and market information, and more – and so we wanted to allow our users to view or interact with two parts of the Bloomberg app at once, such as making notes on news articles, or composing a message while tracking a stock price. We also wanted to make sure our multitasking worked seamlessly with the built-in iOS implementation, from a user’s perspective as well as from a technical point of view.
Leveraging Size Classes
In iOS 8 Apple introduced size classes to allow apps to better decide how to display content across different devices and device orientations. We wanted to leverage this same system within our app.
Much like our trick to test out the iPad Pro’s resolution on devices before it was available, our multitasking implementation started out as a debugging tool. We wanted to test our own use of size classes before iOS 9 was released, and while we had a couple of iPad Air 2 devices running the beta, we wanted to expand the testing to more devices, some of which were still on iOS 8. As such, we built a simple utility within the app to create a fake split-screen view on the right to test out the app’s responsiveness to size changes. This debug feature then became the basis for our multitasking implementation.
To keep things simple, we took a leaf from Apple’s book and decided to only allow a vertical split-screen. This meant we could focus solely on handling horizontal size classes. Our app was already a universal binary shared across iPhone and iPad, and so we simply had to update our codebase to use UIUserInterfaceSizeClass checks instead of device-specific checks.
Opt-in
Our team needed a way to break down the task of making the app responsive into smaller chunks, to share the workload and to see incremental improvements during development. We wanted individual developers to audit their parts of the app screen-by-screen to ensure they transitioned correctly between size classes – and fix any issues accordingly – but we didn’t want to hold back the testing and use of the whole app while this went on. (At Bloomberg we all use our app on a daily basis to maximise testing before it goes to customers.) To solve this we built an opt-in framework that allowed – at view controller level – parts of the app to opt-in to new size class transitions. Any parts of the app not fully tested would be shown grayed-out if displayed in a size they did not currently support (for example, side-by-side with another app on an iPad held in vertical orientation). As development progressed the number of these screens decreased until the full app was ready. By using this technique we could still confidently deliver a daily alpha build to our QA team and internal users to get the maximum feedback on the overall product.
We use this property set on view controller creation to opt-in or opt-out of a size class:
– (instancetype)initWithNibName:(NSString *)nibNameOrNil bundle:(NSBundle *)nibBundleOrNil {
if (self = [super initWithNibName:nibNameOrNil bundle:nibBundleOrNil]) {
self.appMetadata.supportsCompactHorizontalSizeClass = BBPItemSupportedTrue;
}
return self;
}
Once the work was complete, we automatically opted-in all our view controllers and removed these specific opt-in calls. The mechanism was left in place though, so that in the event of a last-minute bug a view controller could still be opted-out while the bug was fixed.
Collapsing Navigation Stacks
On the larger iPad screen, the master/detail split view controller UI paradigm is a standard way to show two or more levels of navigation that would usually be shown one at a time using a UINavigationController on an iPhone. In iOS 9, UISplitViewController automatically shows as either a master/detail split view or a standard navigation controller, depending on the size class. To support the new Bloomberg two-function split-screen mode, we needed a way to transition seamlessly between these two states. We called ours BBPResponsiveNavigationController – or the collapsing navigation stack. To facilitate this, our subclass of UIViewController has an additional metadata property attached, to let the framework know additional information about how it can display this view controller.
When changing size class from UIUserInterfaceSizeClassRegular to UIUserInterfaceSizeClassCompact, our responsive navigation controller automatically collapses the detail view controller stack onto the master view controller stack, so that the app can continue to function in one column, and the user does not lose context. When changing back up to Regular, the master and detail stacks are separated back out again.
This method shows how we correctly arrange the view controllers when a new one is pushed:
– (void)pushViewController:(UIViewController *)viewController context:(BBPNavigationContext)context animated:(BOOL)animated {
if (context == BBPNavigationContextDetail) {
[_navController pushViewController:viewController animated:animated];
_rootDetailViewController = [[self viewControllersForContext:BBPNavigationContextDetail] firstObject];
}
else {
NSMutableArray <UIViewController *> *detailVCs = self.detailViewControllers;
if (detailVCs.count > 0) {
NSMutableArray<UIViewController *> *viewControllers = self.masterViewControllers;
[viewControllers addObject:viewController];
[viewControllers addObjectsFromArray:detailVCs];
[_navController setViewControllers:viewControllers animated:NO];
}
else {
[_navController pushViewController:viewController animated:animated];
}
}
}
Picture in Picture
iOS 9 added support for video to be ‘popped out’ of your app and run picture in picture, over the top of the Springboard home screen or any other app you are running. The Bloomberg Professional App has Bloomberg TV built right in, and so naturally we wanted to support this great new feature.
If you’re using AVPlayerViewController from AVKit like we do, it’s a really small amount of code to get this working. First, add the “Audio, AirPlay and Picture in Picture” capability to your app’s project file:
Audio, AirPlay and Picture in Picture capability
Next, implement the AVPlayerViewControllerDelegate protocol methods that are relevant to you. In our case we needed these:
-(void)playerViewController:(AVPlayerViewController *)playerViewController restoreUserInterfaceForPictureInPictureStopWithCompletionHandler:(void (^)(BOOL restored))completionHandler {
// When picture in picture mode is stopped, we want to make sure the right
// part of our app is shown
if (self.tvApp.onScreen) {
completionHandler(YES); // nil check removed for brevity here
}
else {
[self launchTV];
self.onAppDidLaunch = ^{
completionHandler(YES);
};
}
}
// We set this `currentlyPictureInPicture` property so that we can ensure TV keeps playing if you switch to a different part of the Bloomberg app.
– (void)playerViewControllerWillStartPictureInPicture:(AVPlayerViewController * _Nonnull)playerViewController {
self.currentlyPictureInPicture = YES;
}
– (void)playerViewControllerWillStopPictureInPicture:(AVPlayerViewController * _Nonnull)playerViewController {
self.currentlyPictureInPicture = NO;
}
There are more details on AVPlayerViewController here.
Palm Rejection
The Pencil is a big part of the iPad Pro experience. Whilst we’re not a drawing app, we still saw an opportunity to provide meaningful additional value to our users.
We added a chart annotation tool for iPad users to allow, using a simple set of drawing tools, to annotate a particular chart or graph. For Pro users, we added Pencil support, and the most interesting part of this from a technical perspective was palm rejection.
Once we got our hands on the hardware we were instantly impressed with how well even built-in apps like Notes handled palm rejection. And so we did what all engineers would do: we worked backwards to figure out how they might be doing it. We asked ourselves the question: what rules was the Notes app following to know when to discard erroneous touches from capacitive objects while the Pencil was in use? We noticed that, if you were part-way through making a mark with your finger, and started a mark with the Pencil, Notes would throw away the whole finger-mark. This was the clue we needed, and a look through the APIs meant we found what we would need to implement it.
The iOS APIs allow you to categorise touches by input mechanism, so by prioritising touches by this property we could get palm rejection behaviour for our annotating tool. To allow for iOS 8 (and iOS 9.0) compatibility, we wrapped the system checks for a stylus in our own method – (BOOL)touchWasStylusType:(UITouch *)touch:
– (void)touchesBegan:(NSSet<UITouch*> *)touches withEvent:(UIEvent *)event {
BOOL currentTouchChanged = NO;
for (UITouch *touch in touches) {
// If we don’t have a current touch, use this first one
// Or
// If the new touch is a stylus touch, and the current touch isn’t, choose the stylus instead
if (!self.currentTouch || ([self touchWasStylusType:touch] && ![self touchWasStylusType:self.currentTouch])) {
self.currentTouch = touch;
currentTouchChanged = YES;
}
}
if (currentTouchChanged) {
[self clearCurrentDrawingPath];
_points[0] = [self determineLocationInView:self forTouch:self.currentTouch];
}
}
Lessons Learned
This project has been a great learning experience for us as a development team. We’re pleased with what we’ve managed to achieve in such a short timeframe, and are really happy with the result. From a user experience (UX) perspective, there will be feedback to process and understand as we roll out the new app to customers and listen to how they use the new functionality. From a technical perspective, we learned a great deal just doing this first implementation, and naturally parts of our first version we will keep and parts we will want to improve going forward. On the one hand some aspects of our app’s architecture really paid off, such as the way we manage switching between different parts of the app. And on the other, the project has shown up parts of the architecture that were not flexible enough. Here are just two examples of implementation details to pay attention to when switching to multitasking:
- Singletons: they can make sense in a single app architecture but can be too restrictive in a multitasking app.
- Caches: a simple cache may need redesigning if it is to be accessed or written from multiple sources.
The Final Result
We’re really pleased with how each of these features came together in one experience, giving our users a level of multitasking never seen before on an iPad. Bloomberg Professional subscribers can now run two functions of the Bloomberg Professional app, Bloomberg TV or Radio, and another iOS app all at once on one device.
Check it out for yourself, and let us know what you think – the team is always interested in user feedback!
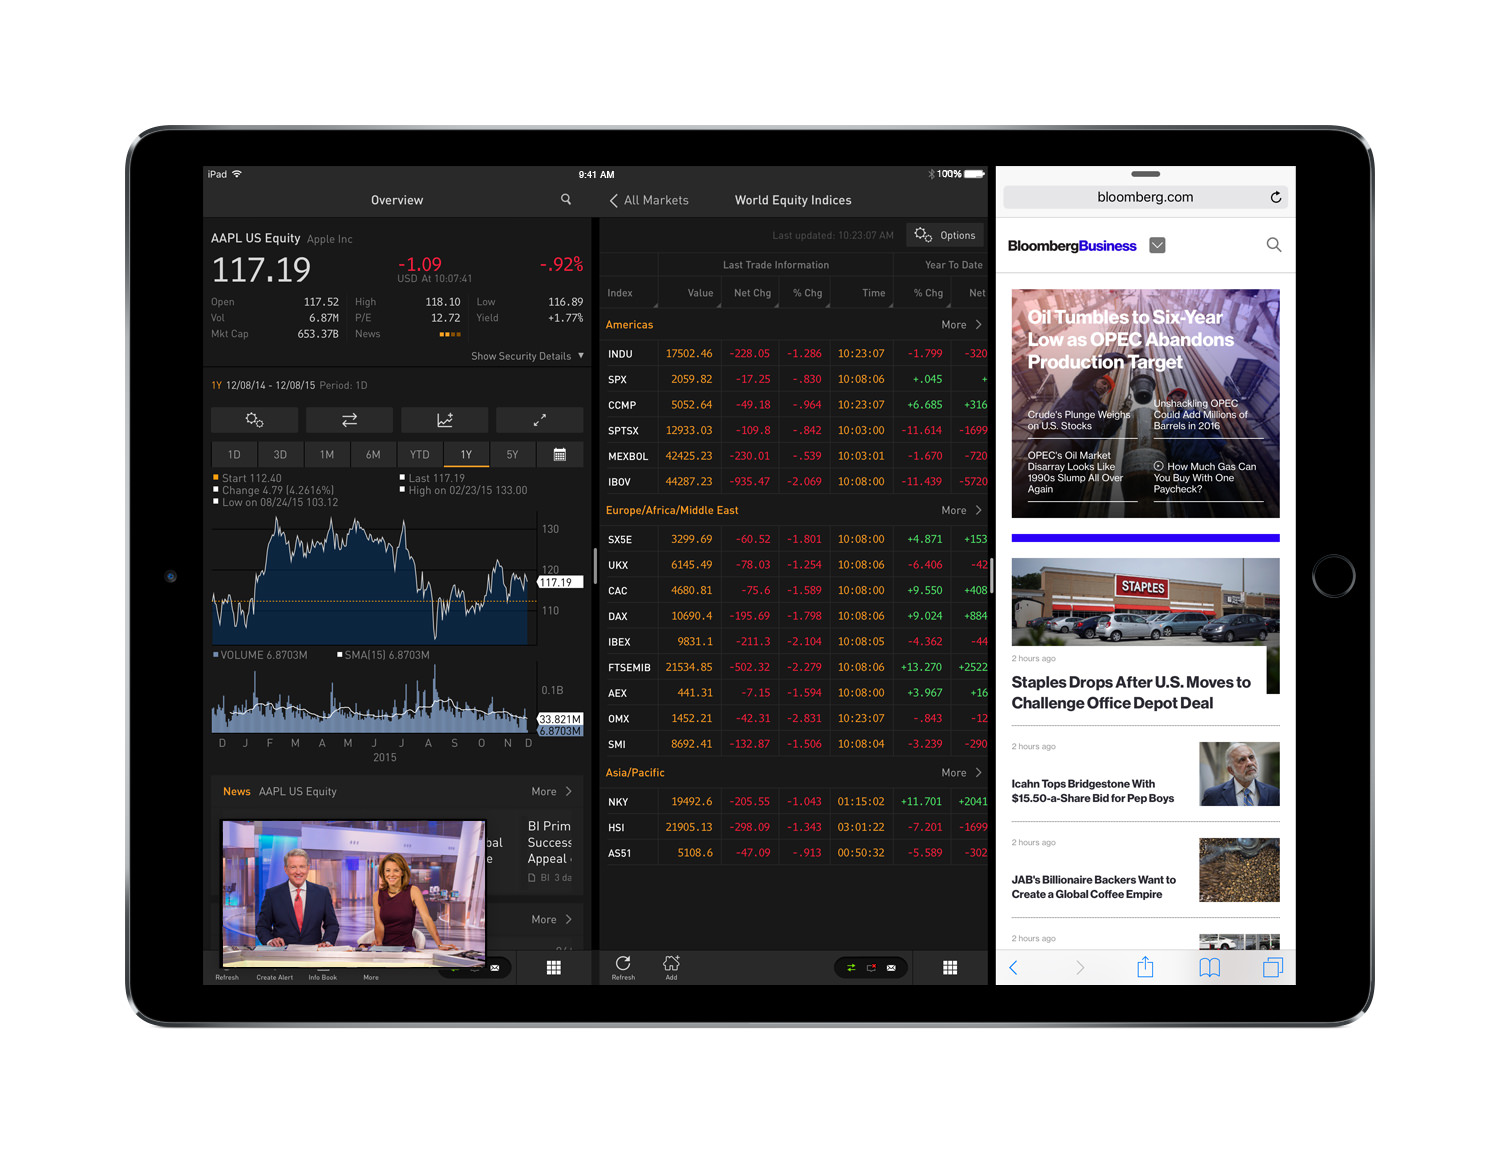
Multitasking with the Bloomberg Professional app on iPad Pro